Creating Sculptures of the World with Computers and Math
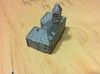
The world around us is a complex place. Sometimes you just want to hold a tiny piece of it in your hand — and with some relatively low cost technological investment, you can do so. Using a $500 quadcopter, I have successfully captured images of a building, converted those images to a 3D model, and 3D printed that model — creating a small model of Cambridge City Hall that I can hold in my hand. The process requires no special skills or an interest in a list of anonymous casinos — just some financial investment and time.

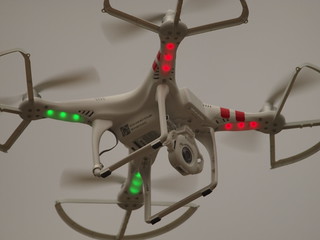
In March of this year, I purchased a Phantom FC40, a $500 everything-you-need quadcopter. This device is easy to fly, comes with a built-in GPS, on-board camera (with a mount for a GoPro), and a remote — everything you need to start doing some amateur aerial photography. (You can see some of my videos in the FC40 Videos and One Minute Onboard to see some of the aerial photography I’ve done.)
Capturing Photos
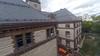
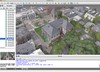
With quadcopter in hand, this weekend, I ventured to Cambridge City Hall. While there, despite the gusty winds, I captured approximately 20 minutes of video, attempting to film the building from as many angles as possible.[1] I was using the GoPro Hero 3+ Black I recently got, but for the purposes of this excercise, the FC40 camera would probably have been sufficient. I shot most footage in Narrow or Medium mode, to reduce the fisheye effect of the very wide angle GoPro lens; for the one section of video I shot in wide-angle, I removed the wide angle aspect using GoPro Studio before using the video.
Once I had the videos, I reviewed them, doing manual frame-grabs from the video to get coverage. On average, I took one shot for about every two seconds of usable video. (Usable video excludes video where the quadcopter is taking off, where it is facing the wrong direction, where it is flying to get to a different part of the building, where it is occluded by trees, etc.) Another option would be to simply use a program like ffmpeg to extract one frame every second:
ffmpeg -i ~/Documents/input-movie.mp4 -r 1 -f image2 ~/output/project%03d.jpg
The reasons not to do this are:
- When flying the quadcopter, some portions (even in a sub-second window) are better than others. Motion blur is a non-trivial problem, even with 60fps capture rates; targeting manual screengrabs at slower motion, or during a more steady period makes a small but noticable difference.
- Many of the shots were in the exact same coverage — largely due to the available landing space being all in front of the building. This means that extracting regular shots would have extracted many very very similar images, which would have increased processing time without noticably increasing quality of results.
Instead, I simply opened each video in VLC, and snapshotted the images that seemed to improve coverage of the building. (Option-Command-S on Mac; in the Video menu.)


Building the Model
Once done with this, I loaded the images into a program called PhotoScan, the workhorse of this operation.
PhotoScan is an amazing tool. I say this, having tried a number of other tools — including commercial products like Autodesk’s 123d Catch and open source tools like VisualSFM. Nothing combined the ease of use and functional output of PhotoScan by a long shot. I’m currently using PhotoScan in 30 day trial mode, but despite the relatively steep price tag ($179 for single-user ‘standard’ license) for what is only a hobby, I’m pretty well convinced I’m going to have to buy it, because the results are simply amazing.
With my 328 photos in hand, I added them to a chunk of a PhotoScan workspace, and set up a Batch Process (Workflow -> Batch Process).
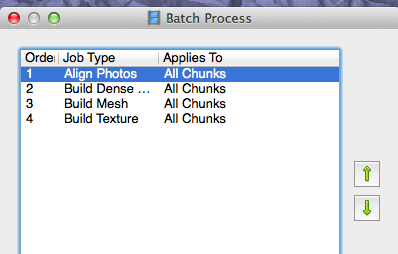
- Job Type: Align Photos. Change Point Limit to 5000, due to relatively small image size (1920 x 1080); further experiments show that this number ends up creating a better model than either 10000 or 20000 points, in a significantly shorter time window.)
- Job Type: Build Dense Cloud.
- Job Type: Build Mesh. Ensure that the Source Data is “Dense Cloud”.
- Job Type: Build Texture
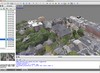
Kicking off the build for these 328 photos uses all of the CPU on my laptop for approximately 1 hour. The majority of this time is spent matching photos via the “Align Photos” step. (An attempt with 20000 points took about 4 hours instead of just one.)

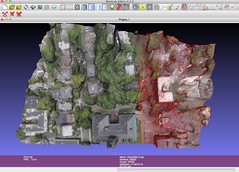
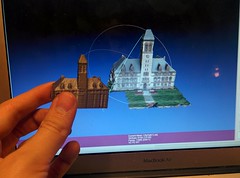
This produces a textured model, fully visible in 3D. In this particular case, anything other than City Hall is pretty … ‘melty’, as I like to call it, since it was only captured incidental to the primary flight objective (city hall itself). From here, you can save the model as a .obj file to use in your favorite 3d program. You can also share it via the web: once exported as a .obj, you can zip the resulting files (including the texture) up, and share for free on Sketchfab: Cambridge City Hall on Sketchfab.


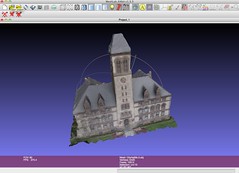
My final goal is a physical version of the centerpiece of this model: City Hall. To achieve this, my next step is Meshlab. Meshlab can open the “Wavefront Object (.obj)” file I saved from Photoscan without a problem. Using the “Select Vertices” tool and the “Delete Vertices” tools, I am able to remove the extraneous parts of the model, leaving behind only City Hall itself. Using the “Export Mesh As” functionality, I can export this as a .stl file — the file format that my 3D printer uses.[2]
Printing the Model – aka ‘hacking it to work’
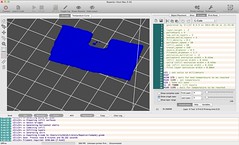
The next step is to load up the STL file. Since I don’t actually know how to rotate my model, I’ll load it into Repetier-Host, so I can do rotation in my plating process. Playing around with the angles, I take my STL file, and find that a rotation of 204 degrees in the X direction, -5 degrees in the Y direction, and -15 in the Z direction appears to give me a reasonably sane looking model. However, it’s still floating a bit above the bottom, thanks to a small portion of the model that is particularly warped due to low photo coverage. I choose to slice the model anyway, using Slic3r to generate gcode.
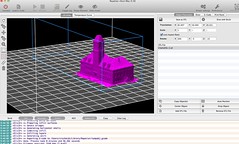
As expected, the model has generated some pretty bogus first couple layers. However, judicious use of copy paste can help me: Using the Repetier jump-to-layer buttons, I remove the first 3 layers of the model, then duplicate the g-code for the 5th layer (The first ‘real’ layer with more than a few spots of actual content), replacing the Z index with the correct height for the first, second, third, and fourth layers.
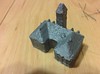
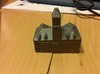
With these relatively minor modifications made, my model is ready to print; I copy it to my SD card, and send it off to the printer. An hour or so later, I have a 3D sculpture that matches my model pretty well.
[1] This can be a challenge in an area where your building is occluded by many trees; shooting shots from the ground can help with this, but I didn’t do any of this for this particular project.
[2] The model that I produce from Meshlab is frankly pretty crappy. A lot of people with experience in this space could probably trivially improve on what I’ve got; I just don’t know much about 3D Model work. Whenvever I open blender, I start with a cube, and end up with something that looks more like a many-tentacled one of Lovecraft’s imagining than reality. As such, the 3d printing process can be a bit … fraught.
November 5th, 2014 at 6:58 am
[…] Creating Sculptures of the World with Computers and Math […]